
BodyTalk
Listen to what your body is trying to tell you!
Each Newsletter includes practical insights from 30+ years helping people move better.
Just a reminder to everyone, my content has moved to Substack! It’s still informative and FREE! Here’s the link for the latest article: https://open.substack.com/pub/therapeuticconnection/p/your-morning-cup-has-a-secretand?r=2g7wd7&utm_campaign=post&utm_medium=web&showWelcomeOnShare=true


We're Growing! Educational Content Is Moving to Substack
Release upper back and shoulder and neck pain with a tennis ball! Find out how


Is Your Tech Use Hurting Your Neck? Understanding and Preventing "Tech Neck"
Is your phone hurting your neck?
Looking down at your device can overload your spine with up to 60 pounds of pressure! Learn how small posture changes can prevent pain and protect your neck.

🧠 Understanding Nerve Health: What You Need to Know to Stay Pain-Free
Are your nerves trying to tell you something?
Tingling, burning, or shooting pain could be signs of nerve irritation. Learn how to protect your nervous system and restore balance through movement, nutrition, and hands-on care.

When “Follow Along” Goes Wrong: The Hidden Risks of DIY Rehab
Relying on YouTube videos for pain relief can backfire when exercises aren’t tailored to your body’s unique needs. Learn why personalized guidance is key to healing safely and effectively.

Medical Mythbusting with Kevin R. Stone, MD
Medical Mythbusting with Dr. Kevin R. Stone
As featured in Play Forever
Think you know what’s best for your health? Let’s challenge some popular beliefs that might be doing more harm than good. From antioxidant overload and sunlight misconceptions to outdated advice on knee pain and supplements, Dr. Kevin R. Stone sets the record straight. Plus, I share my own insights on diet, hydration, and cartilage regeneration. Read on to separate fact from fiction and empower your wellness journey.

Core Activation Made Easy: Strength Without the Sweat
Discover the truth about low back support and core strength. In this blog, I break down the importance of posture, how to assess and improve it throughout your day, and why the transversus abdominis is the real MVP of your core. Learn how to activate your core muscles anytime, anywhere—no intense workouts required. Plus, find out how hip strength and mobility play a vital role in low back health. Simple, practical tips to support your spine and feel your best, every day.

Say Goodbye to Muscle Cramps, Once and for ALL: Book Your 3-Pack of Silan System Healing Sessions Today!
Say Goodbye to Muscle Cramps with the Silan System!
Struggling with muscle cramps? Get lasting relief with Silan System Healing Sessions at Therapeutic Connection! This holistic approach by Carolyn Silan, PT targets the root causes of cramping, using gentle yet powerful techniques to restore balance, ease tension, and improve movement.
💥 Special Offer: 3 Sessions for $300 (Save $150!)
Plus, gain exclusive access to Carolyn’s Muscle Cramp Video Series—practical tips to prevent cramps and support muscle health between sessions.
Don’t let cramps hold you back—Book your 3-pack today!

Muscle Cramps: What You Need to Know and How to Prevent Them
Muscle Cramps: What You Need to Know and How to Prevent Them
Muscle cramps can strike at any time—during exercise, sleep, or even routine activities—causing sudden pain and discomfort. While they may seem random, common triggers include dehydration, electrolyte imbalances, muscle fatigue, and poor circulation.
The good news? Simple lifestyle adjustments can significantly reduce cramping. Staying hydrated, maintaining a balanced diet rich in essential minerals, stretching regularly, and using massage or foam rolling can all help keep cramps at bay. When cramps do occur, gentle stretching, massage, and heat or cold therapy can offer quick relief.
If you struggle with frequent or severe cramping, consider seeking professional guidance. As a PT, I’ve developed a specialized approach to help address muscle cramps at their root cause. Traditional physical therapy may not focus on this issue, but through my Silan System, I’ve discovered effective techniques to manage and even eliminate persistent cramping.
Want to learn more? Visit Therapeutic Connection for personalized support and expert insights into muscle health.

How to Relax: Enhance Your Physical Therapy with a Relaxation Routine
Amplify Your Physical Therapy Routine with Relaxation
Your Physical Therapy home exercise program is designed to strengthen and restore your body, but adding a relaxation routine can take its benefits to the next level. Relaxation techniques, such as deep breathing, gentle stretching, and guided meditation, can reduce muscle tension, enhance circulation, and promote faster recovery. By calming your nervous system, these practices also improve focus and support pain management, making your exercises more effective and enjoyable.
Simple Ways to Incorporate Relaxation
Incorporating relaxation into your routine is simple and impactful. Start with deep breathing exercises to center yourself before your workout, or try gentle stretches like neck rolls and spinal twists to release tension. Guided meditations and progressive muscle relaxation can help create a sense of calm, while heat therapy soothes sore muscles and promotes circulation. These practices require minimal time and can easily fit before, after, or even as a wind-down routine in the evening.
The Mind-Body Connection for Better Healing
Relaxation isn’t just an add-on—it’s an essential part of healing and recovery. A calm mind and body work together to reduce stress, alleviate pain, and support your body’s natural healing processes. By prioritizing relaxation in your Physical Therapy routine, you’re not only enhancing recovery but also fostering a stronger connection between your mind and body for long-term wellness. Take a moment to breathe, stretch, and relax—it’s a powerful investment in your health.

The Healing Power of Touch – How Massage Benefits Your Body and Mind
The Transformative Power of Touch
Touch is one of our most essential senses, deeply influencing our physical and emotional well-being. From birth, it plays a critical role in our development, helping to reduce stress by lowering cortisol levels, boosting mood with serotonin and dopamine, and even strengthening our immune system. Therapeutic touch, such as massage therapy, amplifies these benefits by connecting the mind and body, fostering relaxation, and enhancing overall health. Touch is truly a cornerstone of wellness, offering profound healing for body and soul alike.
The Many Benefits of Massage Therapy
Massage is far more than a luxury—it’s a vital tool for health and wellness. By relieving muscle tension, improving flexibility, and promoting blood circulation, massage helps deliver oxygen and nutrients to tissues, reduces swelling, and speeds recovery. It also supports mental clarity and stress reduction by activating the parasympathetic nervous system, while increasing joint mobility and strengthening the immune system. Additionally, regular massage promotes deeper, restorative sleep, making it a holistic solution to both physical discomfort and mental fatigue.
Incorporating Massage into Your Routine
Making massage a part of your wellness routine doesn’t have to be complex. Whether it’s scheduling regular sessions, practicing self-massage techniques, or embracing daily touch through simple acts like hugs, the benefits are immense. At Therapeutic Connection Physical Therapy and Wellness, we specialize in tailored massage sessions that address your unique needs—whether it’s pain relief, stress management, or relaxation. Touch has the power to heal and transform, and through massage, you can unlock better health and greater balance in your life.

Restoring Cartilage Naturally – Tips and Strategies for Joint Health
Restoring Cartilage Naturally: Tips and Strategies for Joint Health
Cartilage plays a crucial role in maintaining joint health, yet it is often one of the first tissues to show signs of aging and wear. As we grow older, joint pain, stiffness, and reduced mobility can stem from cartilage degradation. Thankfully, with a combination of natural remedies, a nutrient-rich diet, and lifestyle adjustments, you can support your body’s ability to maintain and even restore cartilage. From the simple yet powerful combination of Knox Gelatin and orange juice to cartilage-friendly exercises, there are actionable steps you can take to nurture your joints and promote long-term mobility.
Movement is a cornerstone of cartilage health, as it stimulates synovial fluid production and delivers vital nutrients to the joints. Low-impact activities like swimming, yoga, and cycling are particularly effective, offering gentle exercise without placing undue stress on cartilage. A balanced diet further supports these efforts, with collagen-rich foods, omega-3 fatty acids, and sulfur-containing vegetables playing pivotal roles in reducing inflammation and supporting cartilage repair. When combined with supplements like glucosamine, MSM, and vitamin D, these strategies form a comprehensive approach to joint care.
Rebuilding cartilage is a gradual process, but consistency in your efforts can yield significant benefits. Whether you’re sipping on a daily glass of gelatin-infused orange juice, incorporating joint-friendly exercises into your routine, or making mindful food choices, these strategies can help you reclaim flexibility and resilience. Remember, your body is remarkably adaptive and capable of healing when provided with the right tools. Start today, and let Therapeutic Connection guide you on your journey toward healthier, happier joints.

Easy Core Strength, Everyday!
Strengthen Your Core the Easy Way!
Think core strength requires grueling workouts? Think again! Building a strong, functional core is all about activating your muscles at the right moments during daily activities. Whether you’re sitting, standing, or lifting, core strength can be developed easily—without crunches, planks, or advanced poses.
Discover why your core is essential for posture, spine stability, and injury prevention, and try a simple activation tip to get started. Stay tuned for more practical exercises in upcoming blog posts and videos. Let’s make core strength simple, effective, and accessible for everyone!
Ready to learn more? Visit my website or YouTube channel and subscribe for easy, everyday wellness tips!

New Year, New YOU!
Kickstart 2025 with our exclusive Personal Training 5-Pack! For just $500, get five one-on-one sessions with Carolyn Silan, a licensed Physical Therapist, customized to your fitness goals.
Why choose this package?
Save $250 (1/3 off the original price).
Flexible scheduling—no expiration date!
Sessions designed for your fitness level and objectives.
Expert guidance for proper form, injury prevention, and lasting results.
Enjoy a private, professional therapy gym in Waikoloa Village, where Carolyn will help you build strength, confidence, and motivation for a healthier you.
Act fast—this special offer is for a limited time!
📞 Questions? Call or text: 808-289-0601
Click to purchase and make 2025 your year of transformation!

Think You Have a Pinched Nerve? Let’s Break (and Beat) It Down!
What Is a Pinched Nerve—and What Can You Do About It?
Have you been told you have a “pinched nerve” but aren’t sure what that really means? This blog breaks down the facts, from nerve compression and entrapment to radiculopathy and peripheral neuropathy. Learn how myofascial restrictions in the tissue might be the root cause of your discomfort and why not all pain that feels nerve-related actually comes from the nerves.
At Therapeutic Connection Physical Therapy & Wellness, we specialize in uncovering the true source of your pain. With advanced techniques like neural mobilization, massage, and cupping, we’re here to help you find relief and return to doing what you love. Ready to take the next step? Schedule your evaluation or virtual session today!
Let’s solve the mystery of your pain together. Your body will thank you!

Understanding Nerve Health: How to Keep Your Body’s Wiring Happy!
Did you know your nerves are like tiny highways, helping you move, feel, and even think? They’re the key players in how we experience sensation, including pain. Keeping your nerves healthy is essential for a pain-free, vibrant life.
What Affects Nerve Health?
Nerves thrive when they can move, glide, and stay well-nourished. Issues like tight tissues, poor blood flow, and lack of movement can compress nerves, leading to pain or discomfort. Factors like warmth, proper hydration, and whole-body integration play a crucial role in maintaining their function.
How to Support Happy Nerves
Move Gently: Movement helps your nerves slide and integrate with surrounding tissues.
Stay Warm: Heat can enhance blood flow and tissue flexibility, reducing pressure on nerves.
Think Whole-Body Wellness: Good posture, balanced hydration, and steady movement keep your entire system healthy and aligned.
If you’re dealing with pain, tingling, or numbness, The Silan System at Therapeutic Connection can help. Using techniques like neural mobilization, massage, and cupping, we address nerve health at its core—often with immediate relief!

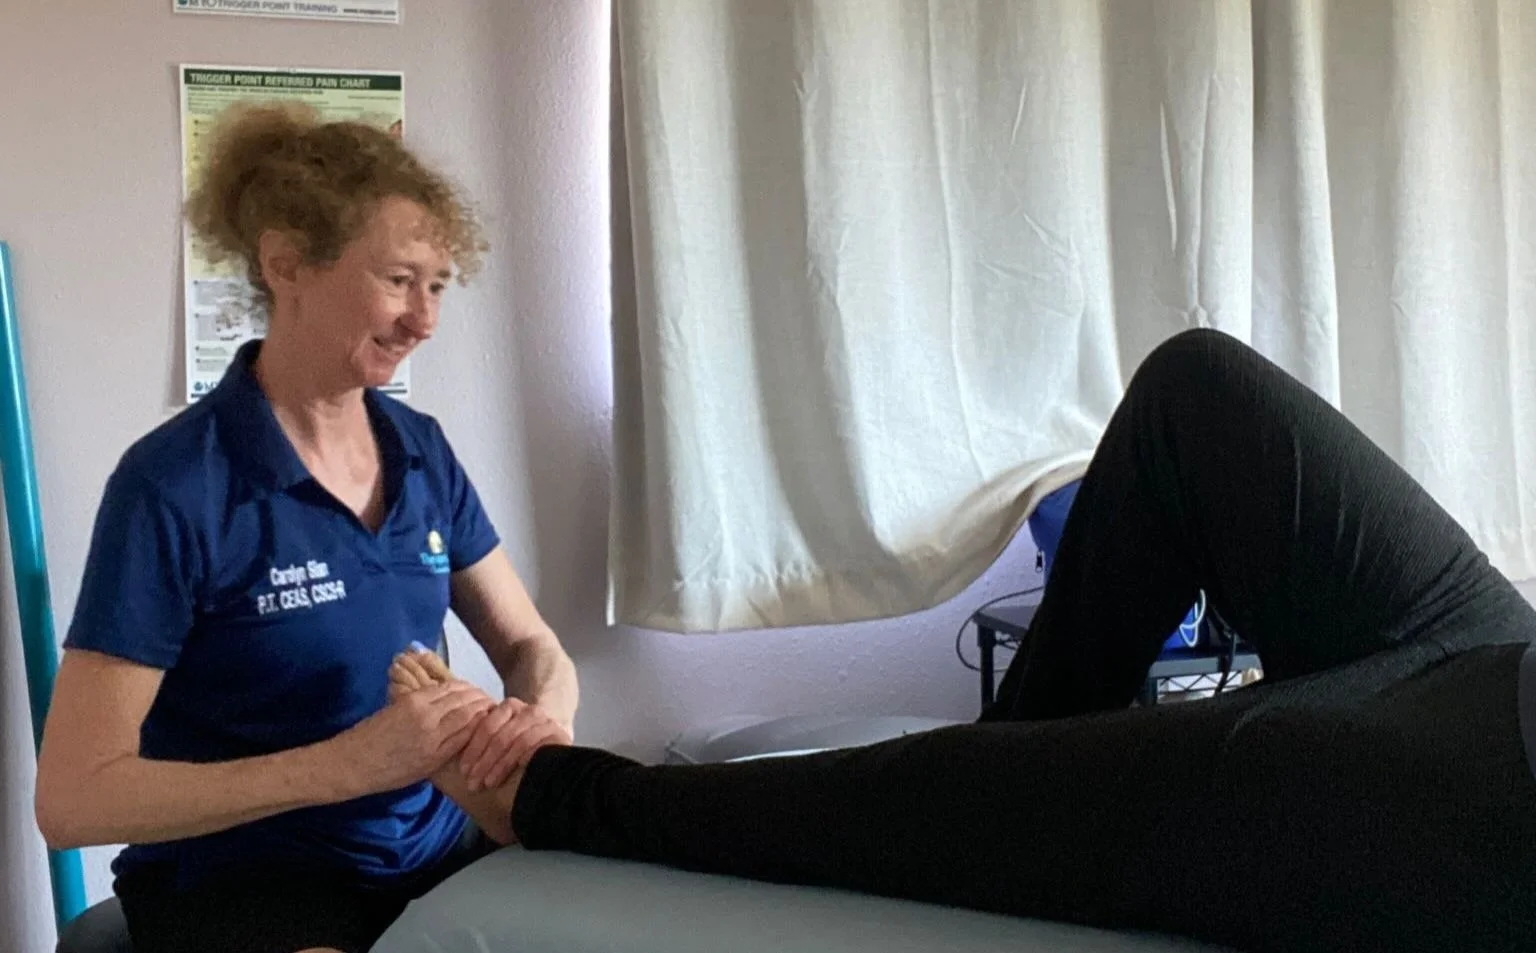
Joint Mobilization: A Path to Healthier, Pain-Free Joints
Joint mobilization is a gentle, hands-on therapy that restores joint movement, reduces pain, and improves overall mobility. By breaking down adhesions and calming overactive nerves, this approach can help you feel better today and for years to come.

Core Strength Made Simple: Anytime, Anywhere, Any Position
Strengthening your core doesn’t have to mean endless crunches or exhausting workouts. The key is activating your core muscles during everyday activities—while sitting, standing, or even brushing your teeth! Your core stabilizes your spine, improves posture, and reduces injury risk, so learning to "switch it on" effectively is essential.
Quick Tip: Sit or stand tall, pull your belly button gently toward your spine, and hold while breathing normally. Repeat this throughout your day for effortless core engagement.
Ready to redefine core strength? Schedule a session and take control of your core health today!

YouTube Wellness Fails: Navigating Exercise Dangers Online
Online exercise videos can be misleading and potentially harmful, as they often fail to address proper form, muscle compensation, and the unique needs of each individual. For safe and effective recovery, it's crucial to seek professional guidance and focus on personalized solutions tailored to your body.

FREE Chair Champions PDF to help you sit smart!
Download a FREE Chair Champions PDF and keep it near your desk for easy reference!